Tuesday, December 31, 2013

January SOTM - Cross-Stitch Wishes

Welcome to the January Stamp of the Month (SOTM)
Blog Hop! 
 Check with your consultant to get this thirteen stamp set - Cross-Stitch Wishes!

If you came here from Judy Burger's Blog  you are on the right track. If you would like to see a complete list of SOTM bloggers click here. We have approximately fifty consultants who have projects to share with you.

Here are the two cards I made this month:

As soon as I saw this stamp set, I knew I would be making adjustments to some of the stamps [or cutting them apart ;o) ]

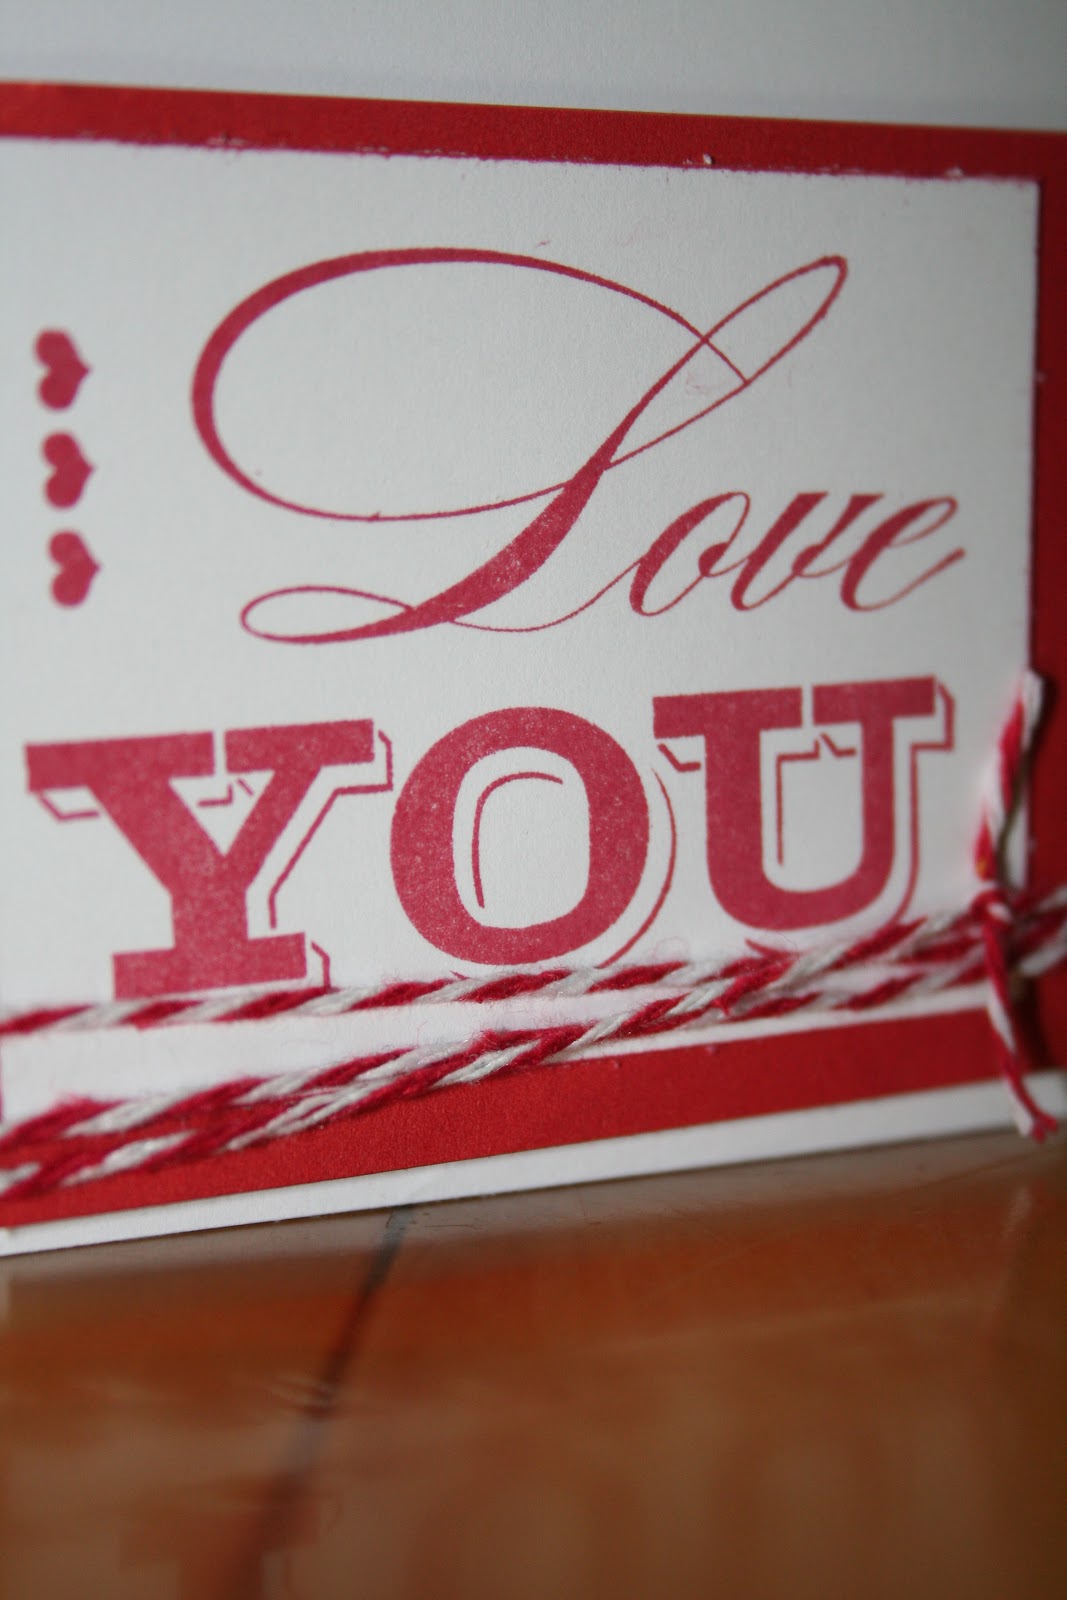
Here is a closer look at the first card:
For this one I cut the heart from the bottom of "You are the BEST" saying.  I then used this stamp to make the background offset heart using Hollyhock ink.  The LOVE saying and hearts were then inked with markers and stamped on a scrap piece of paper.  The edges were inked with Hollyhock and mattings of holly hock and black were used to complete the card.  The saying is popped up with 3-D Foam Tape.  I was inspired to make this card by a Heart You design by Angeline Yong Jeet Leen.
 
And the second card . . .

The background 'cross-stitch' design was created by separating the top cross-stitching from the "SEW special" rectangle stamp.  I then drew my diamonds on a plain card very lightly with pencil and stamped just the cross stitching with black.  Once the lines were established I then used the heart (same one as for the first card) and stamped in Hollyhock, placinb the point of the heart in each corner of the diamonds.  I then cut the round flower from the stem and leaves.  Using the flower I stamped using honey ink, placing flowers in the center of each diamond.  I then cut one ribbon from the clothesline and used pear to stamp the ribbon between the hearts.  The saying is a simple XO in black and the edging is the first two rows of the heart top, inked in hollyhock and stamped around the entire base.  The mats are black, hollyhock and honey with the Saying popped up with 3-D tape.  The final touch is a large bow using the Black Striped Grosgrain Ribbon and the ends around the inside of the card.
 
Continue enjoying more ideas, using this stamp set, by joining Mary Eisen  at her blog.

Saturday, November 30, 2013

December SOTM Blog Hop

Welcome to the December of the Month (SOTM) Blog Hop! Check with your consultant to get this six stamp Special Care set!

If you came here from Michelle John's Blog  you are on the right track. If you would like to see a complete list of SOTM bloggers click here. We have over fifty consultants who have projects to share with you.

Here is the project I made this month:
This little bag is made from two tags cut out using Art Philosophy [Tag3], Page 50, set on 5".  The inside is 4 3/4" x 3 1/8" scored at 1" from each edge to produce a box.  Both tags were embossed with holiday ornaments folder and ink was sponged on the design and a little coloring was applied with markers to highlight the ornaments.  The tags were then scored at 2" from the bottom and then glued together to have two sides and a 2" base.   The box was affixed in the middle.

The black base is also from Art Philosophy [Oval5], Page 62, and the white tag is "[Shape1], page 26.

Here is a side view:

And the inside with the hugs and kisses revealed:
This little goodie is light enough to affix a ribbon under the bling brad to hang this treat in the holiday tree.  I chose to add a double tied ribbon beside the brad on this one!

 Continue enjoying more ideas, using this stamp set, by joining Joy McHargue  at her blog.

Thursday, October 31, 2013

Welcome to the November of the Month (SOTM) Blog Hop! Check with your consultant to get Illuminate!

If you came here from Lucy Kelleher's Blog  you are on the right track. If you would like to see a complete list of SOTM bloggers click here. We have over fifty consultants who have projects to share with you.

Here is the card I made this month:

The base for the wreath on the pole is the shaving cream technique using gypsy and whisper.  I then used the light string to create the wreath of lights and the half circle of lines to create greenage around the wreath.  Add the blings to the wreath and lights and the cards has the sparkle and shine!

Here is a detail of the wreath:

 Continue enjoying more ideas, using this stamp set, by joining Jen Patrick  at her blog.

Monday, September 30, 2013

October SOTM - Scandinavian Wishes

Welcome to the October of the Month (SOTM) Blog Hop! Check with your consultant to get Scandinavian Wishes!

If you came here from Terry Ann Diack's Blog  you are on the right track. If you would like to see a complete list of SOTM bloggers click here. We have over sixty consultants who have projects to share with you.

This month I have a card and project .

Here is the card:

For the card I used the new Artbooking Cricut font to create the ornaments background from dark silver glitter paper (background is inside of the card).  The ornament in the cutout is a dimensional element which was stamped with Ruby ink.  Added the bling to the ornamental spinner and stamped a simple JOY in Ruby on the front.
Here is the card opened up.


And my project is a goodie cone, made with one sheet of paper and a scallop overlay.  I used the Artbooking font to create the wintery scallops in Cranberry.  This was glued over Pear & Partridge paper.  The paper was rolled into a goodie cone and a bling brad was placed at the upper edge of the cone along with a greeting card. 

A bird was stamped in Ruby and added to the card along with the Warm Wishes statement inside.
 Continue enjoying more ideas, using this stamp set, by joining  Kemi Welter  at her blog.

Saturday, August 31, 2013

September SOTM - Poster Tidings

Welcome to the September Stamp of the Month (SOTM) Blog Hop! Check with your consultant to get Poster Tidings!

If you came here from Allisa Chilton's Blog  you are on the right track. If you would like to see a complete list of SOTM bloggers click here. We have over fifty consultants who have projects to share with you.


Here are the two cards I made with the September SOTM:


The first one I added sweeps of colors directly to a white card and then stamped the Autumn set with black. 

The second card I also applied sweeps of color to white cardstock and then stamped the winter sayings over the color sweeps.  I then cut down the saying and placed it on top of the background label cut using the Cricut Artiste Font.


  Continue enjoying more ideas, using this stamp set, by joining Beth Naumann at her blog.

Wednesday, July 31, 2013

August SOTM Blog Hop - A Chocolate Affair

Welcome to the August Stamp of the Month (SOTM) Blog Hop! Check with your consultant to get A Chocolate Affair

If you came here from Joy McHargue's Blog you are on the right track. If you would like to see a complete list of SOTM bloggers click here. We have over fifty consultants who have projects to share with you.

This month's set, A Chocolate Affair which has 16 Yummy stamps to eat up!


The Tag is stamped with chocolates (three in a stamp), in different colors.  They were then iced with stardust Glitz Glitter Gel.  The tag becomes the base for my latest obsession - origami folded boxes.  The box is made from less than one sheet of the new Huntington paper pack and topped with metal rimmed sparkle.


The detail:
Three by three box is perfect for four small turtle chocolates from Skinny Cow (there are six to a package so four to give away and two to eat :)
 
one more of my folding objects:
 
 Continue enjoying more ideas, using this stamp set, by joining Mary Eisen at her blog.
 

Sunday, June 30, 2013

July SOTM - Sweet Life Blog Hop


Welcome to the July Stamp of the Month (SOTM) Blog Hop! Check with your consultant to get The Sweet Life

If you came here from Sarita Schraeder's Blog you are on the right track. If you would like to see a complete list of SOTM bloggers click here. We have over fifty consultants who have projects to share with you.

This month's set, Sweet Life which has great floral graphics, great for summer!
 

This card started with a colonial white base which I stamped with words from Universal Backgrounds, I also used the fireworks from the Home of the Brave Set and stamped with Hollyhock and Crystal Blue and then stamped the quote from the SOTM set using Cocoa.  I then stamped the apple set with VersaMark and embossed with clear.  Then I sprayed sunflower, hollyhock and garden green over the embossed card.  Finally, I came back with the watercolor pen and layed in color in the leaves, branch and the apple. 
The Card was finished off with a Thank You on colonial white backed with an embossed cocoa cardstock.  The thank you was affixed to the hemp surrounding the colonial white cardstack.  Here is a detail shot:
 

 Continue enjoying more ideas, using this stamp set, by joining Judy Burger at her blog.
 
HAVE A HAPPY AND SAFE FOURTH OF JULY!

Friday, May 31, 2013

June SOTM - A Flowering Bunch

Welcome to the June Stamp of the Month (SOTM) Blog Hop! Check with your consultant to get A Flowering Bunch before it is gone.


If you came here from Maria Myers' Blog you are on the right track. If you would like to see a complete list of SOTM bloggers click here. We have over sixty consultants who have projects to share with you.

This month's set, A Flowering Bunch which has great floral graphics, just in time for summer!
 

Below are two cards made with A Flowering Bunch stamps.  One card highlights the negative image and the other highlights the positive.  Hope you enjoy the contrasts.

 
The upper card is made with various images stamped with Versa Mark, the images were coated with clear embossing powder and heat embossed.  Three ink colors (crème bruele, hollyhock and blush) were sprayed over the embossed images using the spray pens.  The Thanks A BUNCH saying was a little larger than the size of label I cut out with the Cricut, using the Art Philosophy cartridge.  So, I used a black marker to color Thanks and then cleaned the stamp and colored A BUNCH to give me flexibility in placing the saying on the label.  Once the label was stamped I inked the edges before placing the label on coordinating mat.  A hollyhock double tied bow was added to the label to complete the card.

The second card was made using hollyhock, sorbet, crème bruele, and topiary to make this layered card (I threw in a little sunflower as well).  The two part label had a ribbon space in the base, the ribbon was placed through the base and around the white cardstock prior to the top piece being attached allowing for the ribbon to lay down nice and flat on the card.  Once again the saying was placed in two parts to ensure a good fit on the label.  This card was intended to provide bursts of color without spending lots of time coloring.

 Continue enjoying more ideas, using this stamp set, by joining Angela Tutton at her blog.

Tuesday, April 30, 2013

Pinwheel - May Stamp of the Month

Welcome to the May Stamp of the Month (SOTM) Blog Hop! Check with your consultant to get Pinwheel before it is gone.


If you came here from Sarita's Blog you are on the right track. If you would like to see a complete list of SOTM bloggers click here. We have about sixty consultants who have projects to share with you.

This month's set, Pinwheel which has several pinwheel designss in different designs and several sayings.
E

The card I made uses the two large pinwheel stamps using pear and lagoon, one mid sized stamp (stripe pattern) in pear and the dot mini pinwheel in lagoon.  The mini pinwheel was cut along the design up to the middle (without cutting through) and the edges where curled by rubbing my fingernail along the curvy parts of the design.  A Green sparkle tops off the bow effect.  Each layer is adhered with a 3D tape square for additional dimension.

 Here is the close up:

 Continue enjoying more ideas, using this stamp set, by joining Shirley Ross at her blog.

Sunday, March 31, 2013

April Stamp of the Month

Welcome to the March Stamp of the Month (SOTM) Blog Hop! Check with your consultant to get My Sunshine before it is gone.


If you came here from Carla Ironside's Blog you are on the right track. If you would like to see a complete list of SOTM bloggers click here. We have about sixty consultants who have projects to share with you.

This month's set, My Sunshine, is a set of eight stamps.

The card I made this month used the cricut balloon, cut out several times.  I then stamped the image in multiple colors and assembled it for a 3-D effect.  I used the bird feather stamp to create the crosshatch in chocolate on the basket.  I then assembled the basket to some varigated color twine.  Added a little glitz and here it is:

 
I like the snowflake cutout in the background as it looks a little like a cloud.
A detail shot:

Continue enjoying more ideas, using this stamp set, by joining Michelle Jones at her blog.

Thursday, February 28, 2013

March Stamp of the Month (SOTM) Blog Hop

Welcome to the March Stamp of the Month (SOTM) Blog Hop! Check with your consultant to get Floral Happiness before it is gone.


If you came here from Michelle Loncar's Blog you are on the right track. If you would like to see a complete list of SOTM bloggers click here. We have about sixty consultants who have projects to share with you.
This month's set, Floral Happiness, is a set of sixteen stamps.

The card I made this month used the large floral stamped several times so that I could cut the image up and create a three dimensional flower using 3D tape.  I put smaller flowers and leaves within the larger image to add dimension.


The black sparkle flourishes are a fun addition to any project.  The colors and paper are from the Claire paper packet.  I also snuck the Doily, from Love Doily set # B1418, behind the flowers - definately one of my favorite stamps in the new idea book!

A detail shot:

The inside:


Continue enjoying more ideas, using this stamp set, by joining Carla Ironside at her blog.

Thursday, January 31, 2013

February Stamp Of The Month Blog Hop

Welcome to the February Stamp of the Month (SOTM) Blog Hop! Check with your consultant to get this set before it is gone.


If you came here from Nikka Geer's Blog you are on the right track. If you would like to see a complete list of SOTM bloggers click here. We have over sixty consultants who have projects to share with you.

My immediate reaction to this stamp set was to cut it up!  I love the different text styles and there are so many words and sayings to play with.   I immediately drew out seven cards, playing with the words.  I was able to complete five of those cards before the hop.  I hope you enjoy my "disected word" approach:

Card #1
I used Home from different stamps and the elements to create a word block.  Also used
 "at" , "There is" , "Nothing" and "LIKE".
 
Card #2
Love, You and hearts pulled from separate stamps.
I cut the hearts and flower using Art Philosophy cartridge (the glitter paper cuts very nicely!)
 
a detail for this card:
Card #3
Here is the inside:
He originally had three eyes.  My son saw it and said, "mom, you need to make him a cyclops - just use your markers!"  I guess he has been around my stamping so long . . .
Card #4
and the inside is one of my favorite things (I love when cards move):
the butterfly was stamped with the new lace doily stamp - just love this stamp!  The flower paper is very old (I'm hoarding the scraps) and the microdots are from a special offered last year.
 
 Card #5
And a detail shot:
Although There is Beauty All Around is part of one stamp.  I cut it apart and separated All Around from the sentance it was in.  I like the additional space between the lines and the ability to left justify my text rather than having it centered (although with cut aparts, you can justify your text as you like!).

The butterfly (a Cricut Art Philosophy cut) is stamped with the swirl on top of Home Sweet Home.  Love the buzz and bumble paper!
 
Continue enjoying more ideas, using this stamp set, by joining Maria Myers at her blog.