Saturday, May 31, 2014

Welcome to the June Stamp of the Month (SOTM)
Blog Hop! 


 Check with your consultant to get this 16 stamp set - KABOOM

If you came here from Tamytha Jenkin's Blog  you are on the right track. If you would like to see a complete list of SOTM bloggers click here. We have over fifty consultants who have projects to share with you.

I am ready for the 4th of July with this month's card:


I just saw the Split Coaster tutorial this week and thought it was perfect for this stamp set.  Wanted the fireworks to "Fly".  I used the cricut to cut out the shapes and increased the size by 1/4" to back each element.  For the large starburst on the front, I use a simple circle and dimensional foam to pop it up.  I first stamped the the image in sunflower and then came around the edges with ruby.  I like how the center looks like a square in the star.

For the inside, I used acetate to pop up the elements stamped on colonial white and sandwiched the acetate between the image and the backing cut with the cricut.

A detail of the images which pop up when the card opens:

Continue enjoying more ideas, using this stamp set, by joining Katy Taylor at her blog.

Wednesday, April 30, 2014

May SOTM - You've Got A Friend

Welcome to the May Stamp of the Month (SOTM)
Blog Hop! 

 Check with your consultant to get this Five stamp set - You've Got A Friend!

If you came here from Krista Ritske's Blog  you are on the right track. If you would like to see a complete list of SOTM bloggers click here. We have over fifty consultants who have projects to share with you.

I made one card and one project this month:


Here is the card I made this month:
This card is a quick one.  I cut the leaves out using the Art Philosophy Cartridge and size 5.  I cut the apple from the Artbooking Cartridge at size 12 (I thought this size would be huge but a 2 was very small).  I cut one of the leaves from the branch and tucked it between the apple and the saying.  Add a red gem for bling and this card is complete.


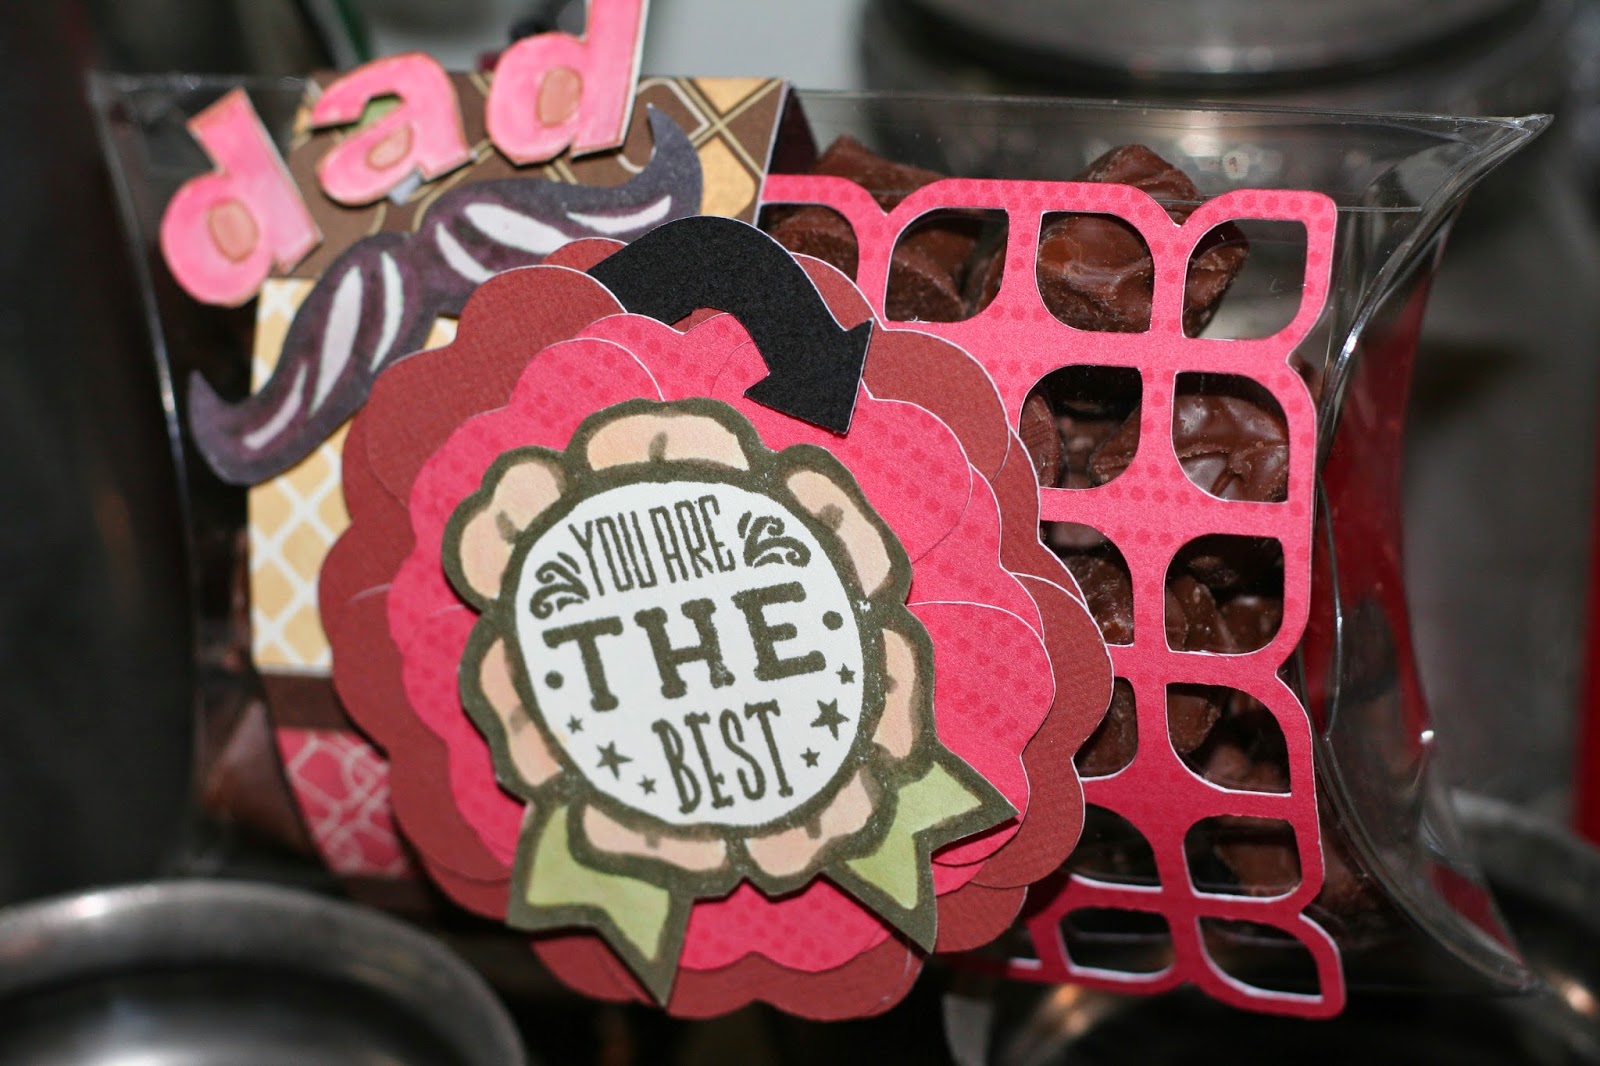
The project is for my dad who was born on Mother's Day!

I used the clear pillow and created a band made from scraps.  Cut the piece down to 2" and wrapped the pillow.  The other piece is a card background from the Artbooking set which I cut square and tucked under the band.  The background for the saying is two brown flowers and two sorbet flowers which I laid out to look like a medallion behind the saying.  I wanted to make sure it was masculine and not too flowery, so I used the mustache from one of the other sayings and stamped DAD.  To keep the flow I added a black arrow.  Filled the pillow with Snicker Bites (these are great treats to fill little boxes, bags or pillows with - right now I have a bunch because I coupon and the sales and coupons made these bags almost free in April!).

Here is a detail shot of the pieces:

Continue enjoying more ideas, using this stamp set, by joining Jean McNulty  at her blog.

Monday, March 31, 2014

April Stamp of the Month Blog

Welcome to the April Stamp of the Month (SOTM)
Blog Hop! 

 Check with your consultant to get this set of Twenty Four stamp set - Balloon Talk!

If you came here from Nancy Womersley's Blog  you are on the right track. If you would like to see a complete list of SOTM bloggers click here. We have over fifty consultants who have projects to share with you.


Here is the card I made this month:
 I must admit, somehow I didn't order this in advance.  I have the May SOTM but not April.  However, since some of the shapes are available through Cricut and I love rainbow cards, I just made the balloon shape in three sizes using the Artiste fonts.  There is a 1", 1.5" and 1.75" cutout.  I then used colors to trace the shapes.
Here is a detail shot:

Here are the materials:
I also cut out a butterfly to create negative space on the card.  Affixed to the butterfly are grey gems.  The ribbon is double tied.  This card allows for a saying on the inside (which I would have if I was organized and had the stamp set).

So, although using the borders in the stamp set are easier to ink and stamp randomly, there are alternatives for additional shapes using cricut cut outs!

Continue enjoying more ideas, using this stamp set, by joining Maureen O'Sullivan  at her blog.

Thursday, March 20, 2014

Emboss It Blog Hop!

Welcome to the Emboss It Blog Hop! 


If you came here from Dana Kessler's Blog  you are on the right track. If you would like to see a complete list of SOTM bloggers click here. here are Twenty Six consultants participating in the hop.


Here are the folders I used on my project:
                 Chevron Folder                             Dot Folder

Here is the project I made:


 I put together a treat holder based on something I saw on Pinterest (LOVE that site).  Had to dust the cobwebs off my geometry to get the sizing correct (Isosceles or Equilateral - that was the question).  The inside compartments were embossed with the chevron folder.  Note the washi tape on the corners - that is what makes this project roll out! 

 The band holding the container together is embossed with the Dot Folder (love the large dot pattern).  I sanded down the dots a little to make them lighter.  I then threw a couple flowers and a birthday greeting on the band.  Need to get some treats to put in the compartments!

Here is the project rolling out! 


Now hop on over to Judy Faye Garner's blog . . . .

Friday, February 28, 2014

March SOTM Blog Hop - Happy Place

Welcome to the March Stamp of the Month (SOTM)
Blog Hop! 
 Check with your consultant to get this set of seven stamps - Happy Place!

If you came here from Michelle Jones' Blog  you are on the right track. If you would like to see a complete list of SOTM bloggers click here. We have over fifty consultants who have projects to share with you.

Here is an image of the stamp set:

Here is the card I made this month:
 I knew I wanted to try the triple tier slider card as soon as I saw this stamp set.  The card is shown closed and the next image shows all three sections open.  I colored in portions of the saying " Home is our Happy Place" using a portion of the saying on each section of the card.  I found a great You Tube video instructions for slider cards.  It was easier than I thought to make and now I wish I had made one sooner.

I used white cardstock as the base for the card sections and popped the color by using B&T scraps under the labels.  I colored the images using markers.

Continue enjoying more ideas, using this stamp set, by joining Shirley Ross  at her blog.